WiFi Client Setup
This is the first page of the WiFi Client setup and connection instructions. If you haven't installed the Vectir WiFi Java application on your mobile phone yet, please view the Mobile Client Install topic. You will also need to have followed the WiFi Server Setup topic before continuing.
If you haven't previously setup a WiFi network connection on your phone, you will need to do this now. Refer to your phones documentation for help with setting up a WiFi network connection. Your PC must be connected to the same network either wirelessly or by an ethernet cable.
Locate and launch the Vectir WiFi Remote application on your phone. A splash screen will be displayed followed by the following menu:
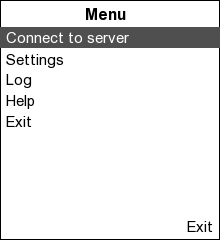
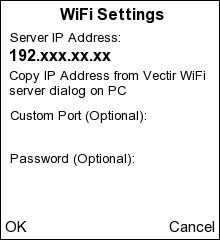
Select 'Connect to server' then enter the server IP address on the WiFi Settings screen. The server IP address must be copied from the WiFi server dialog in the Vectir PC software. This is found in the right hand Setup panel under Hardware. Leave 'Custom Port' and 'Password' empty for now. They can be setup later on by selecting 'Settings > WiFi' from the main menu.
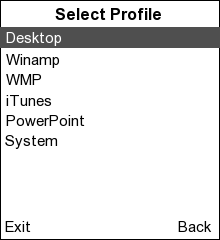
Select OK after you have entered the server IP address. The WiFi client application will now attempt to connect to the Vectir WiFi server on your PC. If the connection was successful, you should now see a list of available remote profiles. You can now select a profile and start using Vectir!