
Data Binding Setup
Note: This section covers setting up data bindings for plugin to plugin data exchange. For Remote Profile data binding setup, please see the Remote Profile Data Bindings topic.
In the configuration panel, select the group that will hold the data binding then select Edit->Add Data Binding.
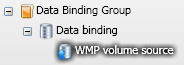
In the Setup panel, locate the required data source then add it to the data binding. You can either drag and drop the data source onto the data binding with your mouse or select the data source then click the Add selected item to configuration button in the Setup Options panel. In the following example, the WMP volume source has been added to the data binding.
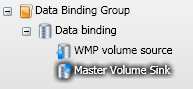
In the Setup panel, locate the required data sink then add it to the data binding. In the following example, the Master volume sink has been added to the data binding.
Vectir will check to make sure the data sink is compatible with the data source when added to the data binding. If they are incompatible, a warning message will be displayed and the data sink will not be added to the data binding.
After the data source and data sink have been added to the data binding, it is ready to test. If you followed the example above, whenever the WMP volume is adjusted, the master volume will be adjusted to the same value.