
Macro Setup
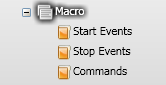
Select the group that will hold the macro then select Macros->Add Macro. A new macro will now be visible in your group:
The next step is to add the macro commands. For this example, commands will be added that will click the Windows Start button. The instructions will only work if the Start button is at the default Windows location at the bottom left hand corner of the screen.
The first step is to determine your display resolution. Under XP, you can find this by right clicking on the Desktop, then selecting the Settings tab of the Display Properties dialog. Write down or remember the screen resolution. Under Vista, you need to look under Control Panel->Personalization->Display Settings to find the screen resolution. For this example, a screen resolution of 1440 x 900 will be used.
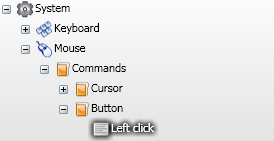
Next a mouse Set cursor position command will be added to the macro. This command is located under System->Mouse->Commands->Cursor in the Setup panel:
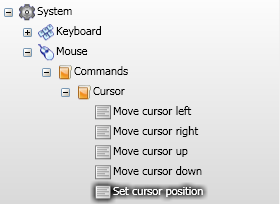
Drag this command into the Commands group of your macro. This will open the Set Cursor Position dialog:
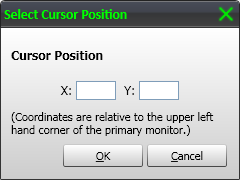
For the X property, enter a value of 20.
For the Y property, enter the vertical resolution of your monitor - 10. For our example, the vertical resolution of our monitor is 900. Therefore we will enter a Y value of 890 (900 - 10).
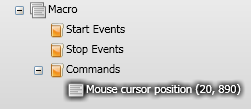
Click OK and the Mouse cursor position command will appear under the Commands group in your macro:
We now need to add a mouse Left click command to the macro. This command is located under System->Mouse->Commands->Button in the Setup panel:
Drag this command into the Commands group of your macro.

All of the commands required to click the Windows start button are now added.
The next step is to add a macro start event. If you are controlling Vectir from your mobile phone, connect to Vectir and load the profile that holds the macro you are setting up.
Select the macro Start Events group then click the Add Event button on the main toolbar. This is the button with a lightening bolt and a plus sign:

The Event Setup dialog will now load:

Press the button on your remote control or phone that you would like to run the macro. The Event Setup dialog will close and the new event will be visible under the command. Rename the event to match the button that you pressed:
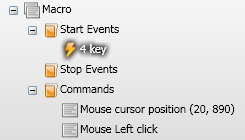
In the example above, the 4 key was pressed. Pressing the 4 key will now run the macro and click the Windows Start button.
If the cursor is missing the Start button, try adjusting the X and Y values as described under step 2. Select the Mouse cursor position command then select Edit->Edit from the main menu to edit the values.
The same technique used in this example can also be used for clicking buttons on other applications in full screen mode. Online media players with virtual buttons that don't support keyboard shortcuts are one example.